Save Management
JKSV
For save data management, JKSV is recommended. It can be used to back up and restore game save data.
The documentation on this page was made in collaboration with JK.
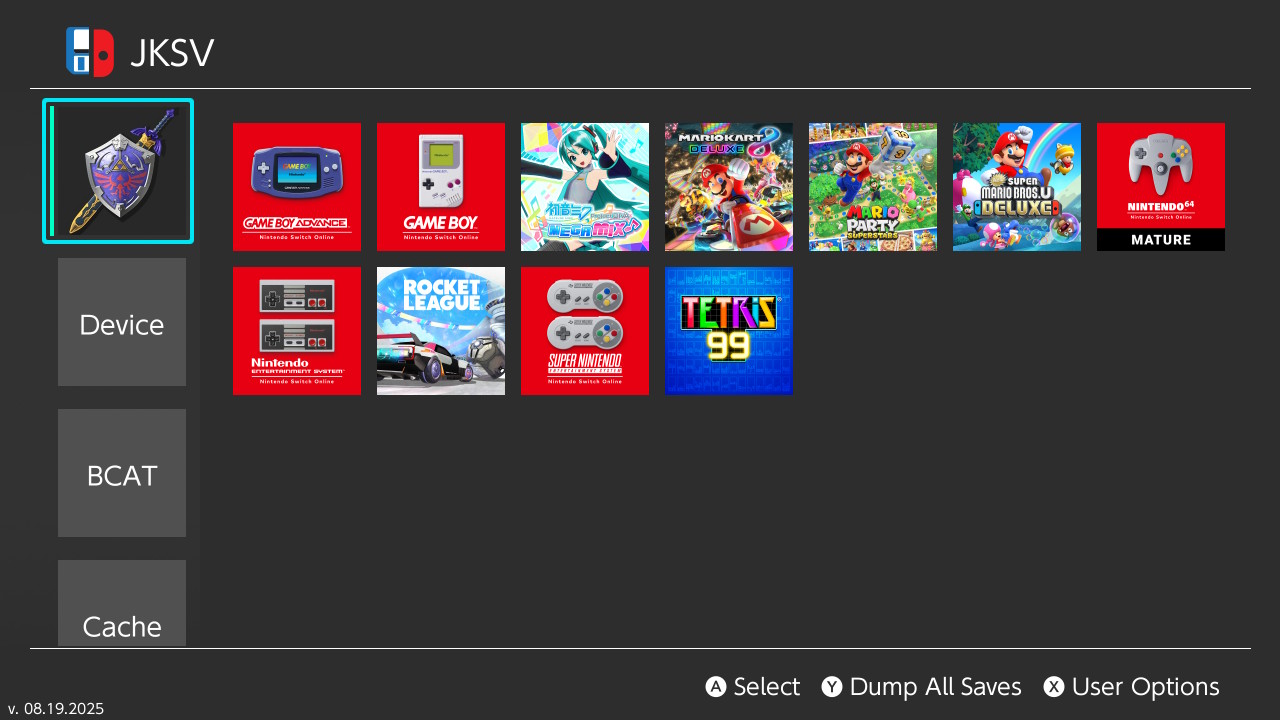
Backing up save data using JKSV
Instructions:
- Launch JKSV from the homebrew menu.
- Select your Switch user on the left side with the
Abutton.- Note: If you wish to back up all save data at once, simply press
Ywhile hovering over your user in the sidebar, then proceed by holdingA.
- Note: If you wish to back up all save data at once, simply press
- Hover over your desired game and press
Ato select it. - Press
Aagain to create a new save backup - Enter a name for the save data folder containing the save data and press
+orOK. - Wait for it to finish backing up your save data.
Restoring save data using JKSV
Instructions:
- Launch JKSV from the homebrew menu.
- Select your Switch user on the left side with the
Abutton. - Hover over your desired game and press
Ato select it. - Hover over the save data folder containing the save data you want to restore and press
Y. - Hold the
Abutton to restore the save data, keep holding it until it's finished.
Setting up remote save data backups (Google Drive & WebDAV)
JKSV features a functionality that allows you to back up your save data from the JKSV homebrew app directly to Google Drive. The setup for this feature is detailed below.
Note: Throughout this guide, clickable items in screenshots will be highlighted in red.
1. Create a new project
Go to Google Cloud Console and click
Select a project(top-left corner).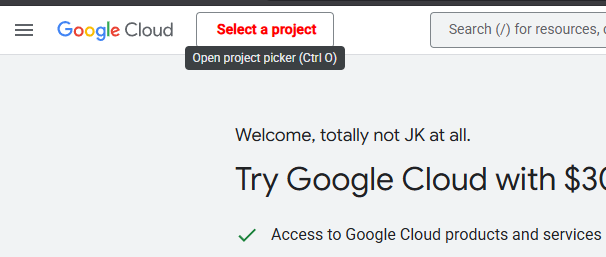
Click New Project (top-right). Name it
JKSV. It's fine to leaveOrganizationblank.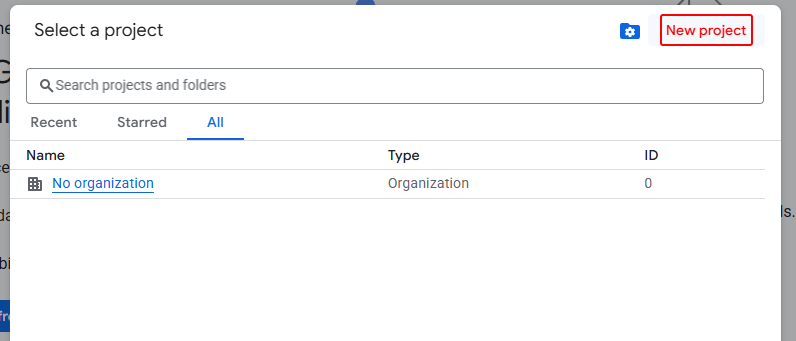
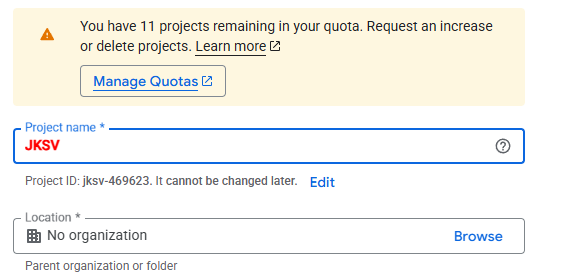
Wait for the project to be created, then click
Select Project.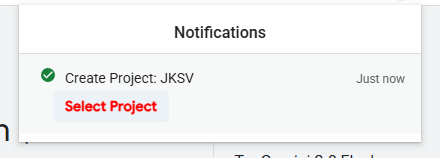
2. Enable the Google Drive API
Click the
Navigation menu(top-left) →APIs & Services→Enabled APIs & Services.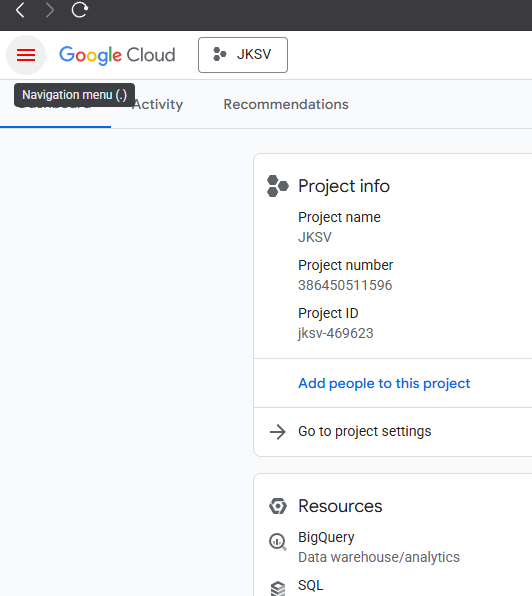
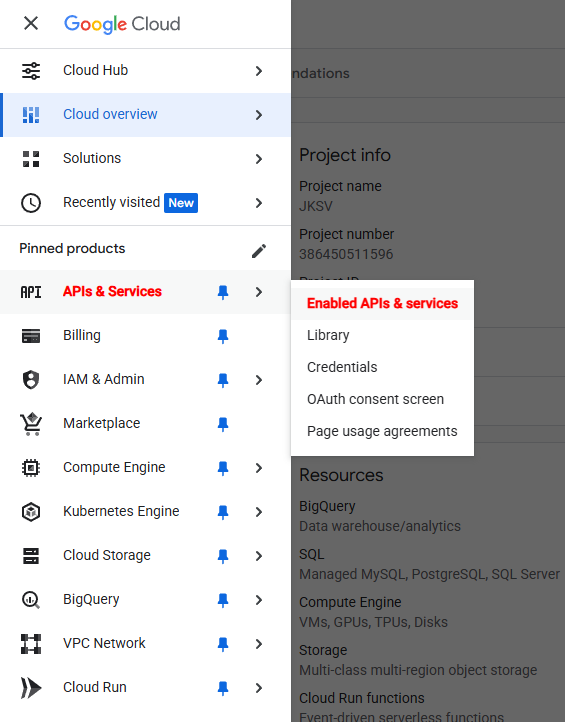
Click
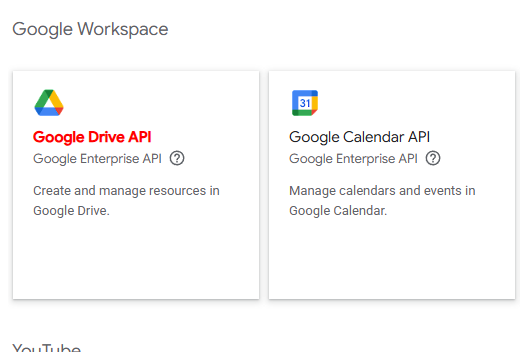
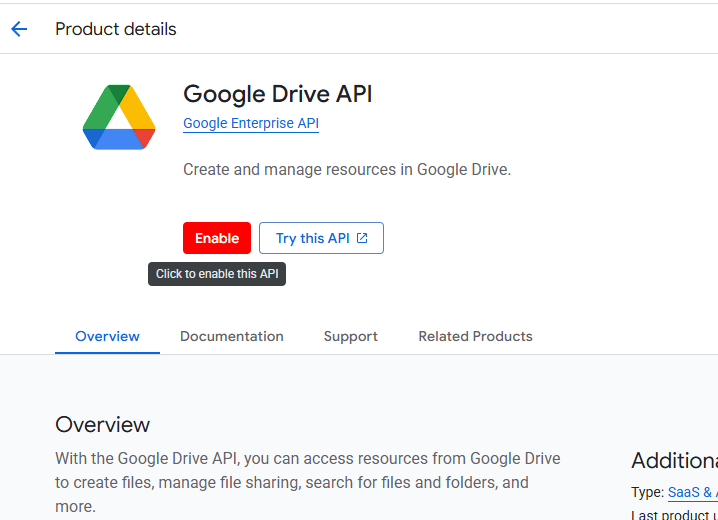
+ Enable APIs and services, scroll toGoogle Workspace, selectGoogle Drive API, and clickEnable.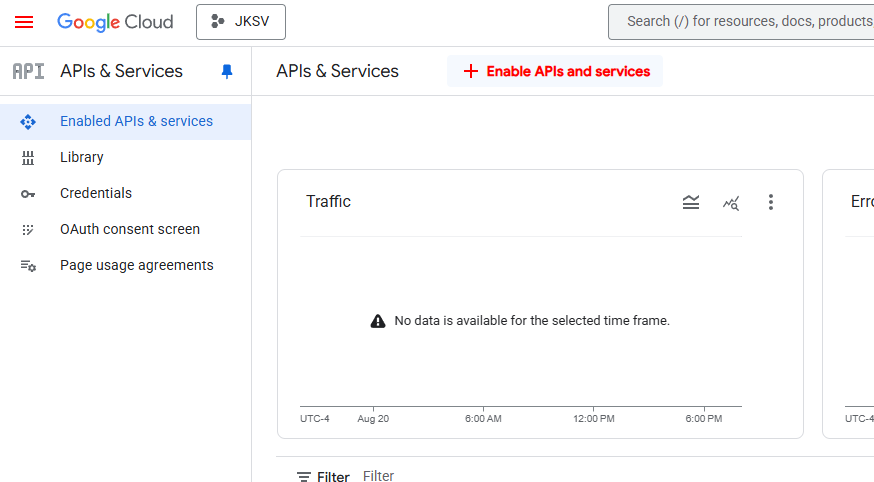
3. Create OAuth credentials
Go to
Credentials→+ Create Credentials→OAuth client ID.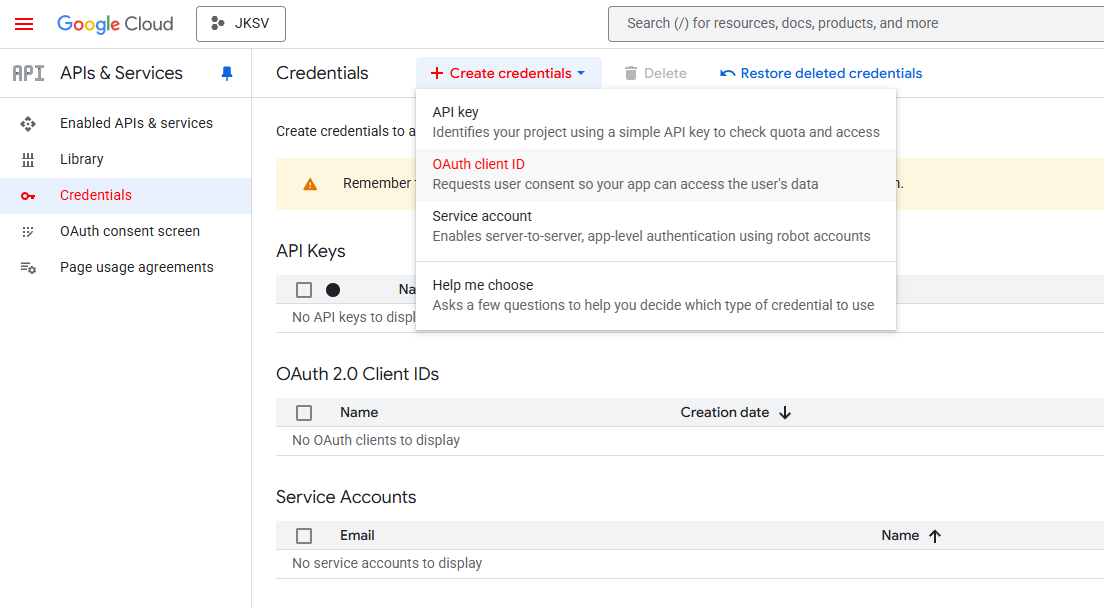
Click
Configure consent screen.
Click
Get startedto start configuring Google Auth Platform.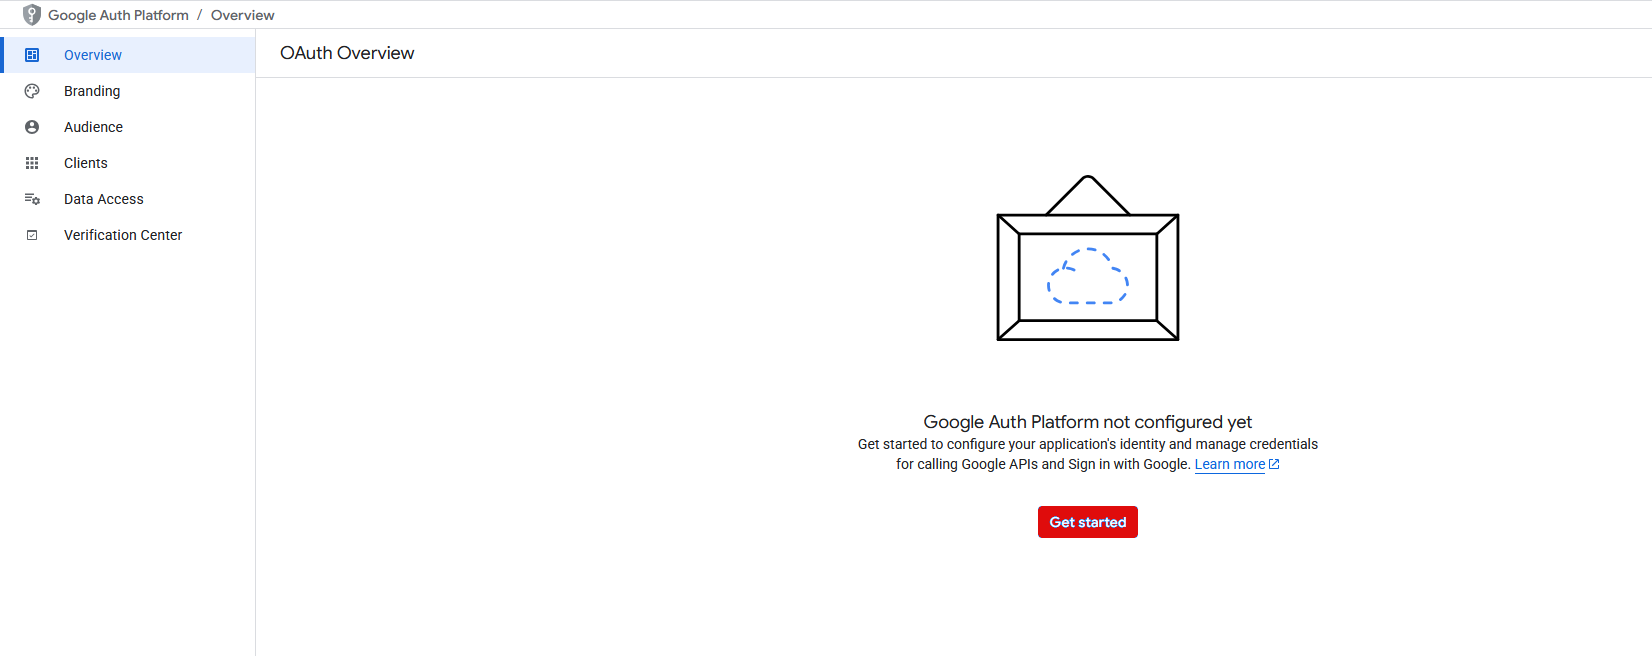
Fill in
JKSVfor the app name alongside the user support email (the email of the Google account you're currently using) and clickNext.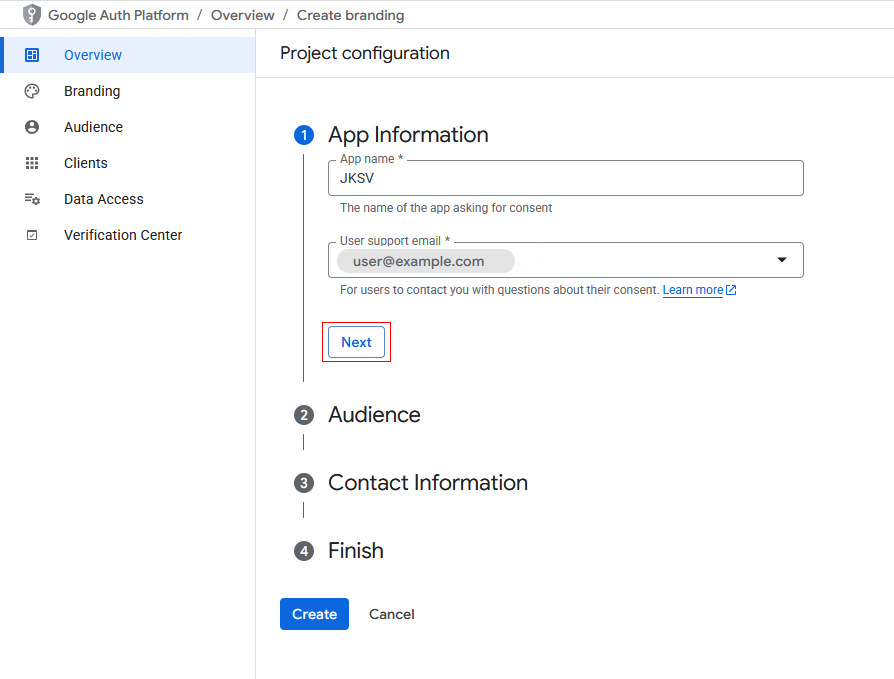
Select
External, clickNext.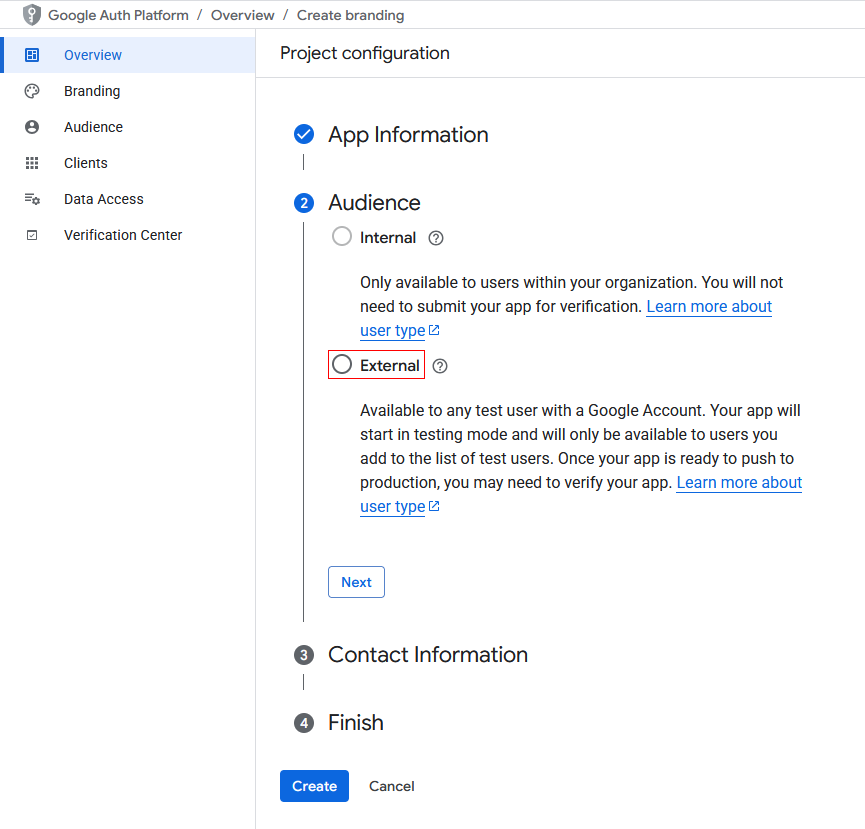
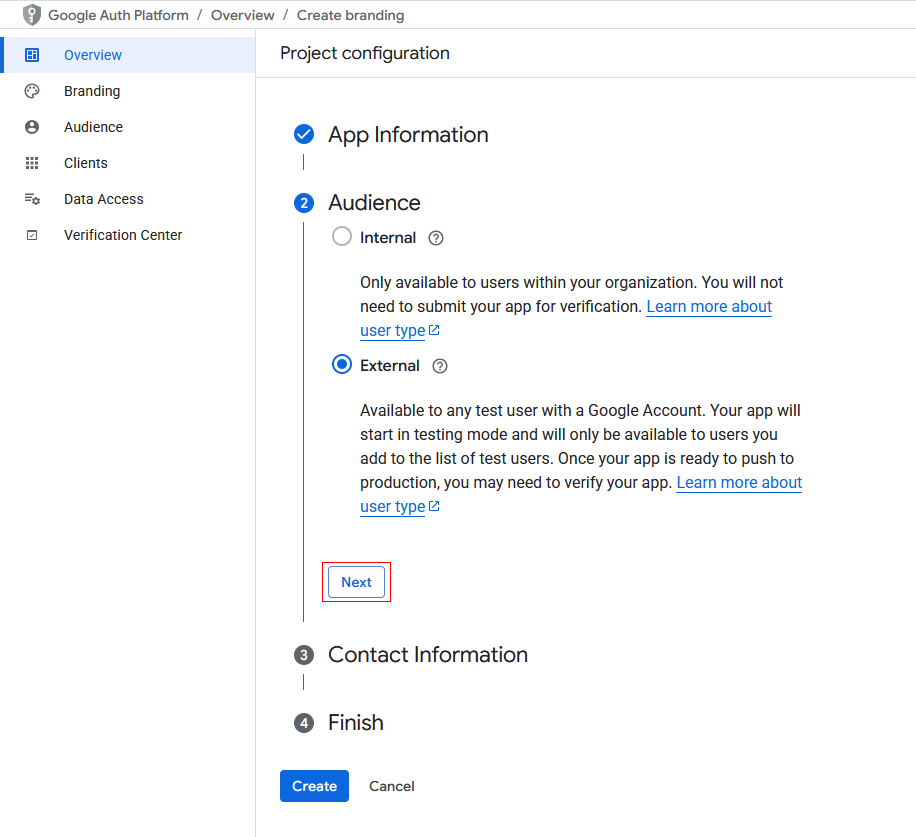
Fill in your own email into the contact information field and click
Next.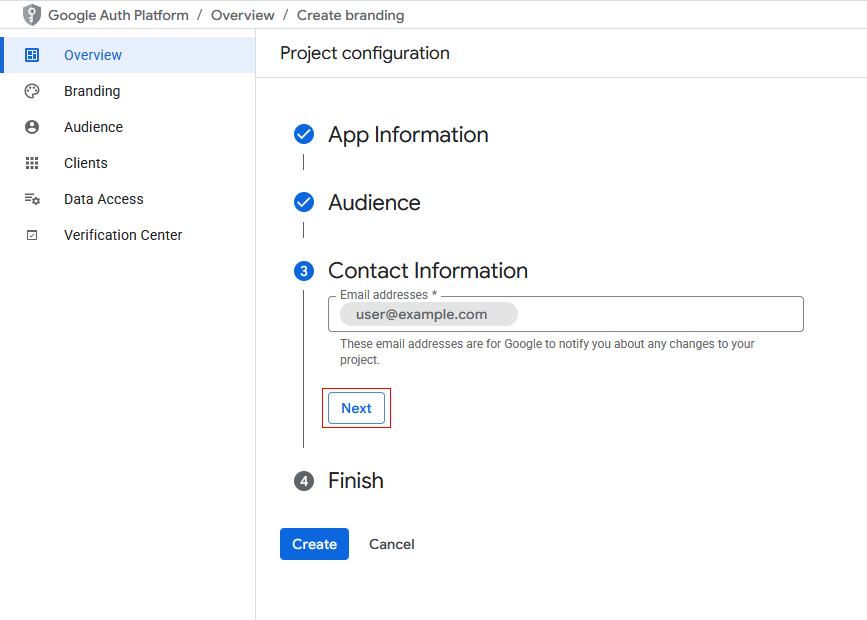
Click the checkbox to agree to the
Google API Services: User Data Policyand click onContinue.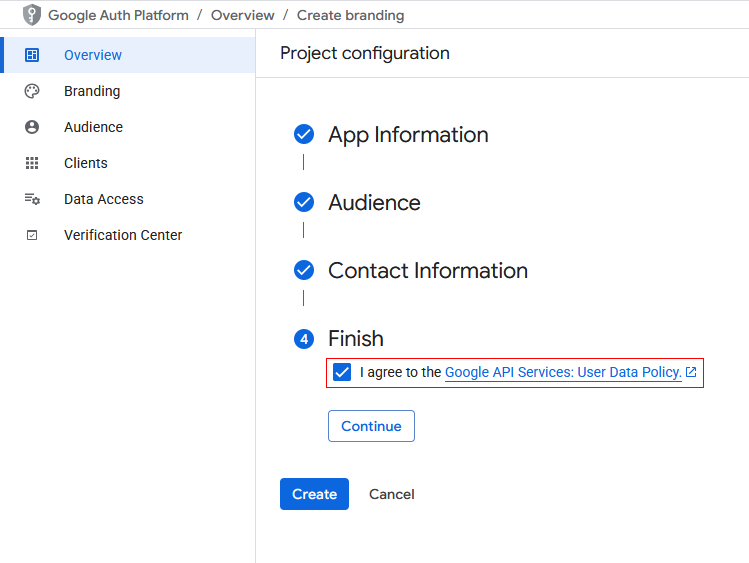
Now, click on
Createand it will take you back to the overview. Click onCreate OAuth client.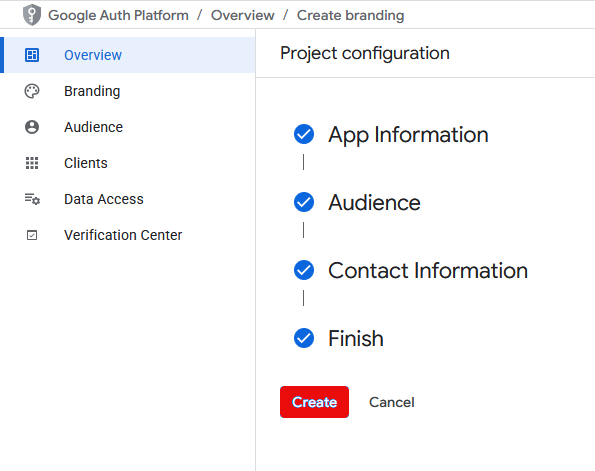

Set the
Application TypetoTVs and limited input devices, then set the name for the client (can be anything, the nameJKSVis used in this guide).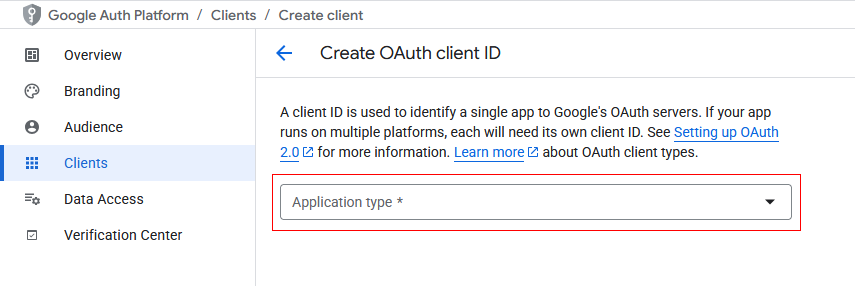
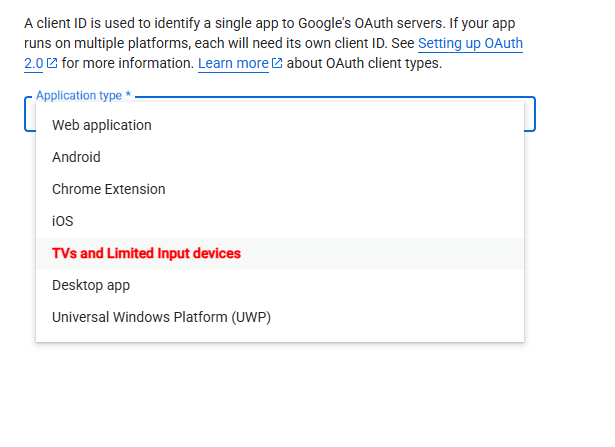
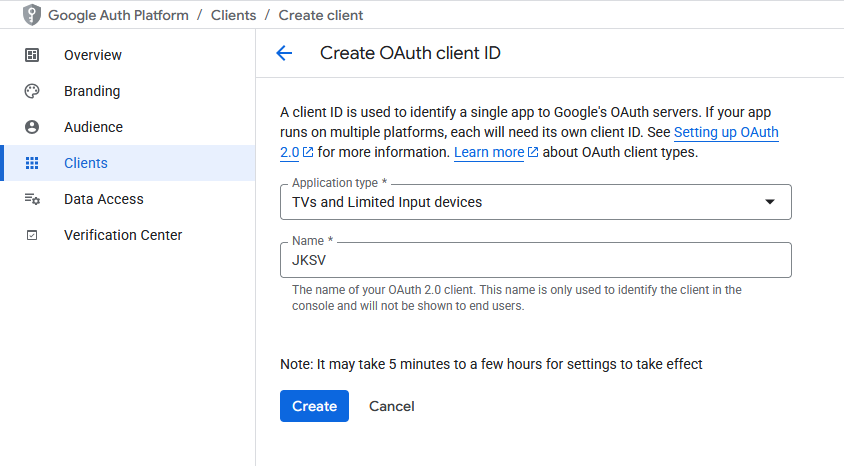
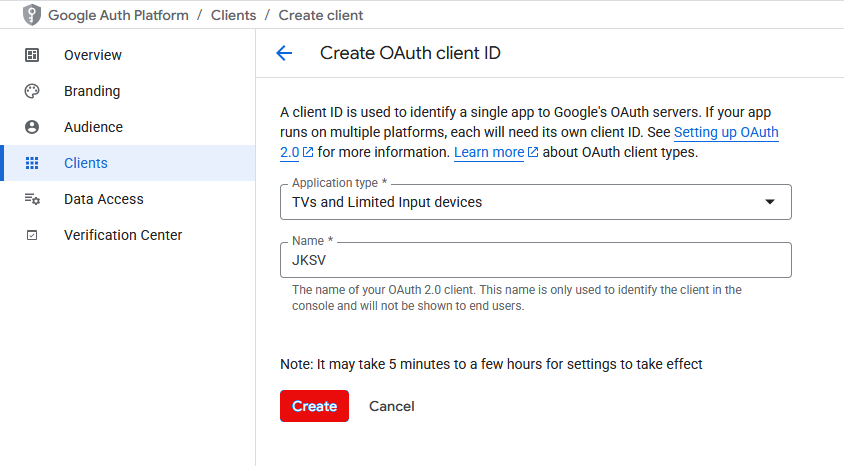
Click on
Createand you will end up at the final window for this step, download the JSON file containing the client info for JKSV.DANGER
- Note: Google will not allow you to download this file again after this point!
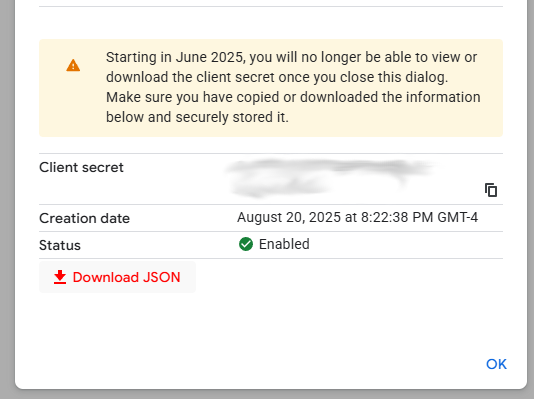
Rename the downloaded file to
client_secret.jsonand store it somewhere safe.
4. Add yourself as a test user
Go to
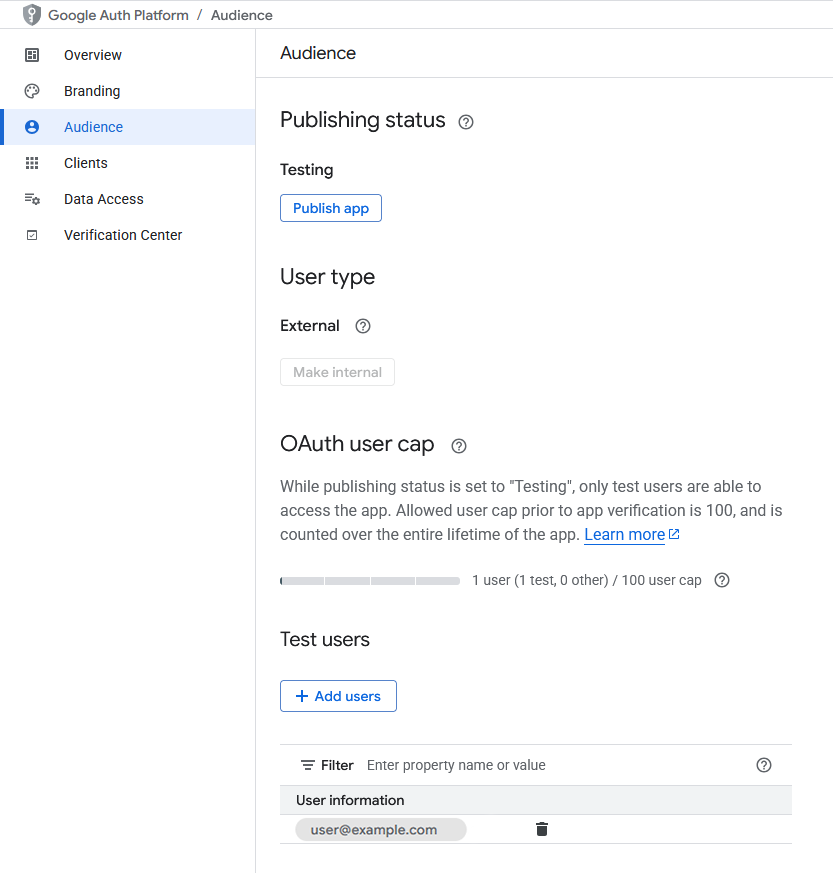
Navigation menu→APIs & Services→OAuth consent screen→Audience.Click
+ Add usersand add your email.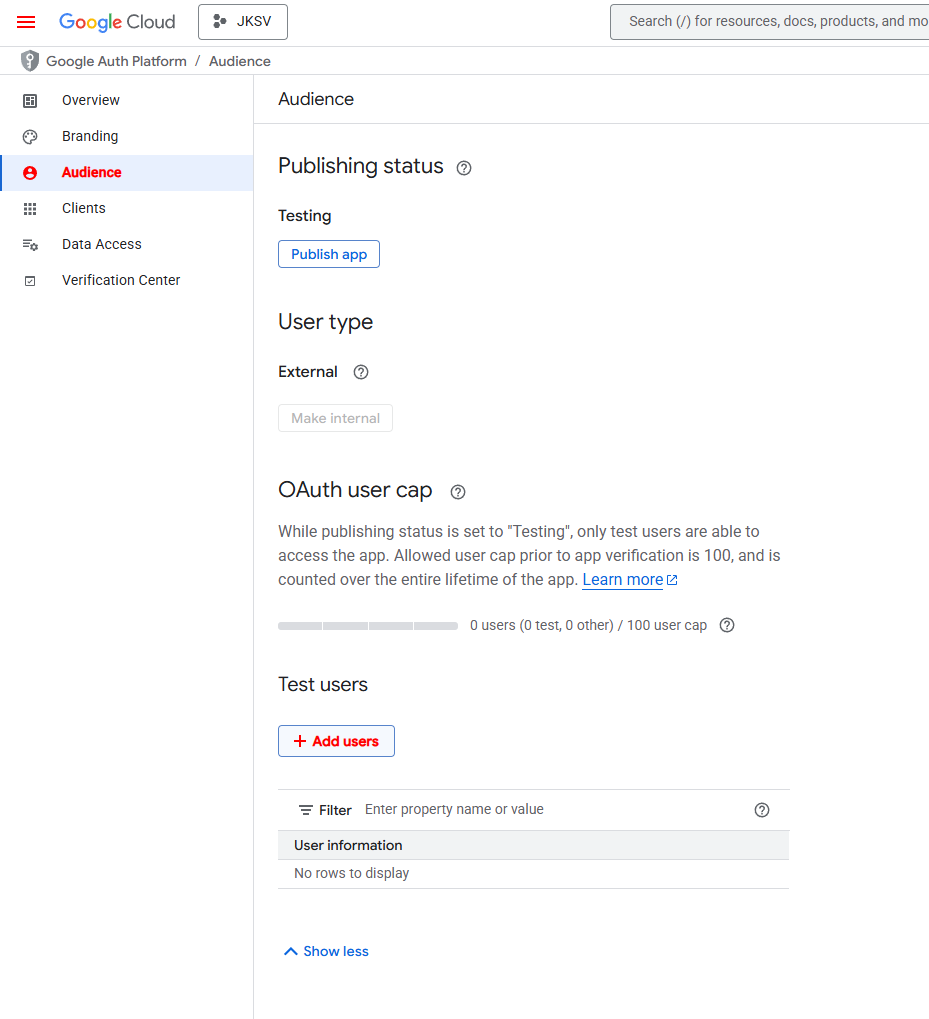
5. Copying the JSON file to your microSD card
Copy the client_secret.json file to: sd:/config/JKSV.
6. Launching JKSV
The next time JKSV starts with an internet connection, it will guide you to complete the login process by navigating to https://google.com/device and filling in the code mentioned in the middle of your screen in JKSV.
After the primary setup for Google Drive, you can launch JKSV with an internet connection again and it will give you a notification near the bottom of your screen stating Successfully signed in to Google Drive! if your configuration file was set up correctly. You can now back up and store your save data backups on Google Drive by pressing Zr on any save data backup!
7. (OPTIONAL BONUS STEP!)
- Make a secure backup of
client_secret.jsonfrom your microSD card after logging in with JKSV.- This is recommended if you plan to share saves between multiple consoles due to Google’s OAuth scope policies.
JKSV features a functionality that allows you to back up your save data from the JKSV homebrew app directly to a WebDAV server. The setup for this feature is detailed below.
Please note that this feature requires you to either sign up for a WebDAV server provider or selfhost your own WebDAV server on your local network.
1. Creating and applying the WebDAV configuration file
Create a file named
webdav.jsonand paste the following contents in it:{ "origin": "https://example.com", "basepath": "path/to/JKSV", "username": "optional", "password": "optional" }Create a folder named
JKSVon your WebDAV server.- Note: The folder name doesn't have to be called
JKSV. For the sake of this guide,JKSVwas used for consistency purposes.
- Note: The folder name doesn't have to be called
Fill in the
origin,basepath,usernameandpasswordfields, the base path is case sensitive and beginning/trailing slashes should be left out in theoriginandbasepathfields. Keep the information below in mind.- The
originfield should always contain the host portion of the WebDAV server you're connecting to. - The
basepathfield should either contain the absolute path to the location of the WebDAV endpoint + folder created in the previous step or you can use an aliased folder. - The
usernameandpasswordfields should contain your credentials you use to authenticate with your WebDAV server. These lines can be left out/removed entirely if you do not have authentication set up for your WebDAV server.
If you need WebDAV configuration examples, unfold the section below.
WebDAV configuration examples
Example 1:
Your WebDAV endpoint is hosted on a local server with IP address
192.168.1.100with the WebDAV endpoint running at192.168.1.100/webdav, on which you created theJKSVfolder. In this example you do not use any authentication.{ "origin": "http://192.168.1.100", "basepath": "webdav/JKSV", }Example 2:
Your WebDAV endpoint is hosted on a WebDAV server provider at
https://app.koofr.net/dav/Koofr, on which you created theJKSVfolder. In this example you do use authentication.{ "origin": "https://app.koofr.net", "basepath": "dav/Koofr/JKSV", "username": "<Koofr email address>", "password": "<Generated WebDAV password>" }Example 3:
Your WebDAV endpoint is hosted on a local server with IP address
192.168.1.100with the WebDAV endpoint running at192.168.1.100/webdav, but you have an alias for192.168.1.100/webdav/JKSVset up so that your endpoint is available on192.168.1.100/JKSV. In this example you do use authentication.{ "origin": "http://192.168.1.100", "basepath": "JKSV", "username": "<WebDAV username>", "password": "<WebDAV password>" }- The
2. Copying the JSON file to your microSD card
Copy the webdav.json file to sd:/config/JKSV.
3. Launching JKSV
The next time JKSV starts with an internet connection, it will give you a notification near the bottom of your screen stating WebDav successfully started! if your configuration file was set up correctly.
You can now back up and store your save data backups on your WebDAV server by pressing Zr on any save data backup!
Checkpoint
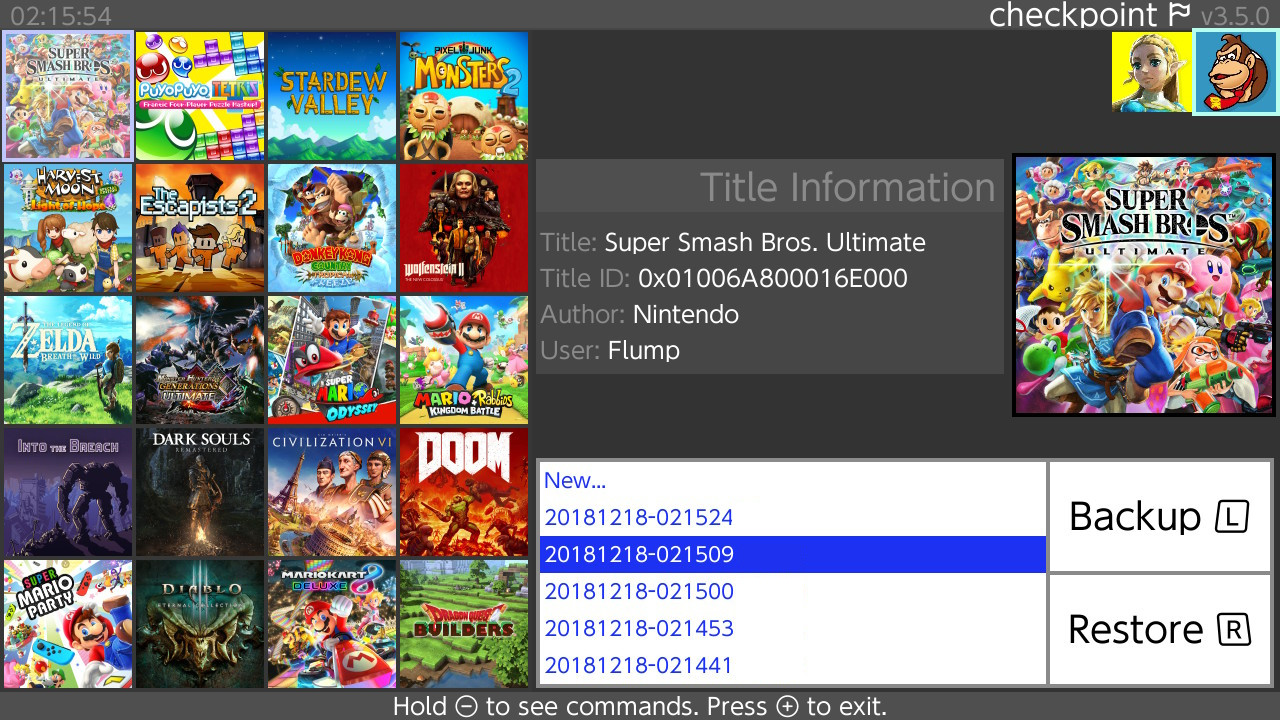
Checkpoint is also a save manager. It can be used to back up and restore game saves to your microSD card. It also has the ability to share save data over FTP and WiFi.
Checkpoint Documentation
Please read Checkpoint's homepage for information on how to use it.
