Sending a Payload
WARNING
If you are here to test if your Switch is patched
Make sure you have put your device into RCM and downloaded hekate. Once finished, if your console is not patched, continue with the "Preparing hekate" section at the bottom of the page.
Now that the device is in RCM, we will need to send it a payload. The methods are mostly the same but slightly differ depending on what hardware you have available.
Injecting a payload
Section I - Requirements
- The latest release of TegraRcmGUI (either the MSI or zip)
- A USB-A to USB-C cable (or a standard USB-C cable if your computer natively supports USB-C)
- The latest release of hekate. The hekate payload (
hekate_ctcaer_(version).bin) is located inside of thehekate_ctcaer_(version).zip.
Section II - Instructions
- Install and run TegraRcmGUI.
- Navigate to the
Settingstab, then pressInstall Driverand follow the on-screen instructions.- If you face issues when installing the driver, follow the driver installation with Zadig section below.
- Connect your Switch in RCM to your PC using the USB cable.
- Navigate to the
Payloadtab of TegraRcmGUI.- Your Switch should be shown as detected in the bottom left corner.
- Press the file button next to
Inject payload, and navigate to and select thehekate_ctcaer_X.X.X.binfile.- Do not use the hekate payload included in TegraRcmGUI. It is outdated and missing a feature needed later in the guide.
- Click
Inject payloadto launch the payload you selected.- If your payload was successfully injected your switch should have yellow text that says "Update bootloader folder!", this will be resolved soon.
Optional - Driver installation with Zadig
Follow these steps if you face issues when installing the driver with TegraRcmGUI. You will need the latest version of Zadig.
- Launch Zadig. In the
Optionsmenu, be sure thatList All Devicesis enabled. - Connect your Switch in RCM to your PC using the USB cable.
- In Zadig, select "APX" in the device list.
- Select
libusbK (v3.1.0.0)in the driver list. - Click
Install Driverand wait for the installation to finish.
If you experience issues with TegraRcmGUI or you just want to try a different payload injector, you can check out JTegraNX by unfolding the section below.
Alternative payload injector for Windows
Section I - Requirements
- The latest release of JTegraNX
- A USB-A to USB-C cable (or a standard USB-C cable if your computer natively supports USB-C)
- The latest release of hekate. The hekate payload (
hekate_ctcaer_(version).bin) is located inside of thehekate_ctcaer_(version).zip. - At least Java 11+ (ideally 21 LTS)
Section II - Instructions
- Download and run the JTegraNX-X.X.X.jar file.
- Connect your Switch in RCM to your PC using the USB cable.
- Click the
Browse for payloadbutton, then navigate to- and select thehekate_ctcaer_X.X.X.binfile.- Note: You can also click the
Payloadstab at the top of the JTegraNX window and select the latest hekate payload from there.
- Note: You can also click the
- Click the
Inject payloadbutton.- If your payload was successfully injected your switch should have yellow text that says "Update bootloader folder!", this will be resolved soon.
Section I - Requirements
- The latest release of JTegraNX
- A USB-A to USB-C cable (or a standard USB-C cable if your computer natively supports USB-C)
- The latest release of hekate. The hekate payload (
hekate_ctcaer_(version).bin) is located inside of thehekate_ctcaer_(version).zip. - At least Java 11+ (ideally 21 LTS)
Section II - Instructions
- Download and run the JTegraNX-X.X.X.jar file. (This can be done from terminal or from your file manager.)
- Note: You will need to run JTegraNX as root, unless you follow the instructions at Linux injection without root.
- Connect your Switch in RCM to your PC using the USB cable.
- Click the
Browse for payloadbutton, then navigate to- and select thehekate_ctcaer_X.X.X.binfile.- Note: You can also click the
Payloadstab at the top of the JTegraNX window and select the latest hekate payload from there.
- Note: You can also click the
- Click the
Inject payloadbutton.- If your payload was successfully injected your switch should have yellow text that says "Update bootloader folder!", this will be resolved soon.
If you experience issues with JTegraNX, you just want to try a different payload injector or you don't want to use Java, you can check out fusee-nano by unfolding the section below.
- Note: fusee-nano has a tendency to simply not work on some system configurations for unknown reasons. Please keep this in mind.
Alternative payload injector for Linux
Section I - Requirements
- The latest release of fusee-nano (also available on the AUR)
- If you use Arch Linux or a derivative distro, the AUR package is recommended.
- A USB-A to USB-C cable (or a standard USB-C cable if your computer natively supports USB-C)
- The latest release of hekate. The hekate payload (
hekate_ctcaer_(version).bin) is located inside of thehekate_ctcaer_(version).zip.
Section II - Instructions
- Download and run the payload injector from your terminal. You will need to run the injector as root, unless you follow the instructions at Linux injection without root.
- Connect your Switch in RCM to your PC using the USB cable.
- Run fusee-nano with:
./fusee-nano /path/to/hekate-ctcaer_X.X.X.bin- As mentioned earlier, unless you have followed the instructions at Linux injection without root, this will require root to run. For most systems, this is done with
sudo - If your payload was successfully injected your switch should have yellow text that says "Update bootloader folder!", this will be resolved soon.
- As mentioned earlier, unless you have followed the instructions at Linux injection without root, this will require root to run. For most systems, this is done with
Section I - Requirements
- The latest release of CrystalRCM (the
CrystalRCM.(version).dmgfile) - A USB-A to USB-C cable (or a standard USB-C cable if your computer natively supports USB-C)
- The latest release of hekate. The hekate payload (
hekate_ctcaer_(version).bin) is located inside of thehekate_ctcaer_(version).zip.
Section II - Instructions
- Download the latest release of CrystalRCM.
- Mount the
CrystalRCM.(version).dmgfile, open the mounted disk image in File Explorer and copy theCrystalRCM.appfile inside of the mounted disk image to any location on your Mac. - Open the
CrystalRCM.appapp, then clickSelect payloadand select thehekate_ctcaer_X.X.X.binfile.- macOS may warn you about the application being downloaded from the internet. To get around this warning, hold the control key while clicking the application, then click Open and Open again.
- macOS Sequoia users: Apple has changed how unsigned applications from the internet are opened. You will need to follow the instructions on the hacks.guide Wiki to open the application.
- Connect your Switch in RCM to your PC using the USB cable, make sure it's also detected in CrystalRCM.
- Once selected, click
Push!. The payload should now be injected successfully.- If your payload was successfully injected your switch should have yellow text that says "Update bootloader folder!", this will be resolved soon.
Section I - Requirements
- The latest release of Rekado
- You will need to enable Unknown Sources in your device settings to install this
- A USB-C cable
- If your device has a USB-C port, you may use a C-C cable
- If your device only has a Micro USB port, you will need a USB OTG adapter and a USB A-C cable
- This will not work on every phone!
- The latest release of hekate. The hekate payload (
hekate_ctcaer_(version).bin) is located inside of thehekate_ctcaer_(version).zip.
Section II - Instructions
- Copy the hekate_ctcaer
.binfile from the hekate.zipfile to a location on your phone.- A tool such as Amaze File Manager can do this.
- Launch Rekado on your phone.
- Navigate to
Payloads(Signified by a downwards arrow with a line), then press the+button at the bottom right. - Navigate to your hekate_ctcaer
.binfile and tap it to add it to Rekado's menu. - Optional, but recommended: Navigate to Rekado's settings in the top right and enable
Hide bundled. - Connect your Switch in RCM to your phone using the USB cable.
- If prompted, grant Rekado access to the Switch.
- Select the
hekate_ctcaer_X.X.X.binfile in the dialog that pops up.- If your payload was successfully injected your switch should have yellow text that says "Update bootloader folder!", this will be resolved soon.
Section I - Requirements
- A USB-A to USB-C cable
WARNING
About USB-C
If your Chromebook has a USB-C port, do note that this will not work using a C-C cable.
Section II - Instructions
- Go to the injection website and scroll all the way down
- Open the dropdown menu and select
hekate_ctcaer_X_X_Xfrom the list. - Connect your Switch in RCM to your Chromebook using the USB cable.
- Select "Deliver Payload". A pop-up will appear. Click the
APXoption. - Press the Connect button and the payload will be injected.
- If your payload was successfully injected your switch should have yellow text that says "Update bootloader folder!", this will be resolved soon.
DANGER
If nothing happens after you send the payload
If your console's screen remains black after you've sent hekate (or any other payload), it's possible your payload was corrupted, or that your console is patched. If your payload injector program shows that zero or 0x0000 bytes were sent, then it is patched. This isn't a one-time glitch or up for debate; it is patched. Consider an alternate method that isn't via RCM.
Preparing hekate
We will prepare the microSD card for formatting/partitioning before going to the next page. Removing the microSD card while in hekate is safe so turning off the console is not necessary and keeping it on will save time that would be spent re-injecting the payload.
DANGER
Following the guide will delete everything on your microSD card!
Later in the guide, you will be formatting and/or partitioning your microSD card. This means that all data on the microSD card will be lost. Now is a good time to back up all of its data to a safe place (for example, on your PC or external drive) so that you can restore it later. You can do this by following the instructions below.
Section I - Requirements
- The latest release of hekate.
- Your microSD card
Section II - Instructions
Without turning your Switch off, remove the microSD card from the Switch.
Insert your microSD card into your computer.
Copy the
Nintendofolder (and any other important data) from the root of your microSD card to a safe space on your device.Extract the hekate
.zipto a location on your computerInside the extracted hekate folder you will find a folder named
bootloader.Copy the
bootloaderfolder to the root of your microSD card.Put your microSD card back into your Switch.
Press either volume button or power to continue to the hekate menu.
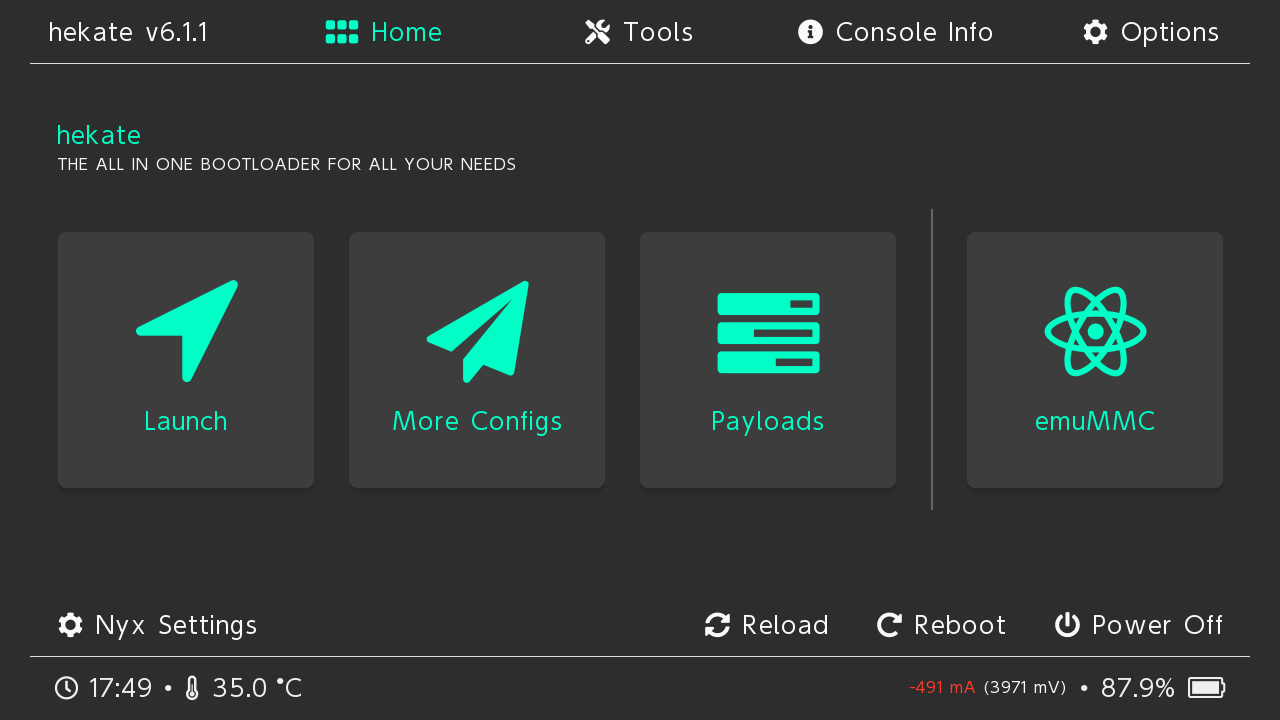
Use volume up and volume down to navigate the hekate menu. Hover over 'load nyx' and press the power button to select. Your screen should now have the hekate GUI (Nyx) pictured below.
Click the button below to continue to choosing your CFW environment.